Are you an admirer of old sewing machines? Or are you looking to cash in on the antique sewing machines you’ve acquired? Whichever reason it may be, you must have come across the name “Kenmore” during your rough research. Or you’ve found an old sewing machine with the name on it and wondered what it was?
Well, Kenmore is a very prominent brand assigned by Sears Roebuck to sewing machine units. The brand had a major effect on the sewing machine industry during the late 19th and 20th centuries. As Kenmore sewing machines were sold on an astronomical scale compared to others. Due to the fact it was heavily mass-produced and distributed effectively via a trusted 500-page mail-order catalog to farmers and settlers all around growing rural America. Also, Kenmore units were considered sturdy, efficient, and more affordable compared to their competition. Which grew their popularity In return.
The antique market today holds a lot of value. As you could get or sell the units for a couple of tens or a couple of hundreds depending on certain factors such as its rarity.
Read on as we delve further into how to identify your Kenmore sewing machine (model name & number) and how to place a value on them from your findings with our price guide. model name, numbers, and so on.
Table of Contents
The History Of Kenmore Sewing Machines
The main reason for Kenmore’s impressive success in the sewing machine industry through the late 1800s to 1900s is Sears Roebuck. This department store (founded in 1893) adopted an effective system that redefined the way Americans shop.
This special system is their 500 mail-order catalog pages which grew in popularity during the late 19th century.
Prosperous settlers and farmers all around rural America patronized Kenmore products for years via the trusted catalog pages of Sears. Anticipating a newer model of Kenmore Sewing machines. Because most of their designs from its introduction offered nothing short of a top-quality sewing experience in every era.
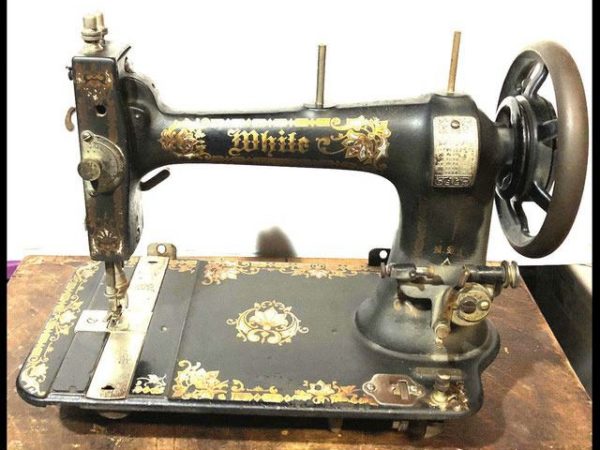
Its first unit was the treadle-powered Kenmore Sewing machine which was manufactured and sold in 1913. However, its production was halted in 1919 as it was the beginning of the first World War. This major event greatly demanded war production efforts.
It was until the 1930s that production of Kenmore Sewing machines resumed. But this time they were electric-powered. Thus supplanting the previous mechanisms such as hand-powered and the treadle-powered models. The manufacturer in charge of such sewing machines is white. As they entered a contract with Sears by 1933 to produce sewing machines with the Kenmore brand name on them.
However, according to the deal, white were allowed to produce their own branded sewing machines alongside Kenmore units. Until 1942 which marks the start of the second world war that lasted till 1948. During this period, production efforts had to be shifted towards war.
By 1949, white resumed the contract with Sears for the manufacturing of electric-powered sewing machines. Only for white to lose its contract with Sears by 1958 due to bankruptcy from over-dependence in producing Kenmore units. Some years after (still within the 50s) Sears entered into a contract with Janome, a Japanese sewing machine company.
They manufactured sewing machines with special features such as a buttonhole maker, zigzag stitching mechanism, and so on. However, users of these products at this time complained of the drop in durability compared to units from previous Eras. This problem later led to Sears employing Singer as well during the 1970s. But it was only for a short period (didn’t go past the 70s).
The partnership with Janome on the other hand lasted till 2013. As they manufactured computerized sewing machines which offered increased efficiency in mass production.
Sadly, during that period (the early 2000s) Sears had already filed for bankruptcy. Because they no longer have ample finances to manufacture sewing machines as they did in their earlier eras.
How to Date a Kenmore Sewing Machine
Dating your Kenmore sewing machine can be done via the model number. This piece of information allows you to identify the manufacturer of the unit. And you can easily use this information to help trace the time Sears collaborated with the discovered manufacturer from 1913 to 2013.
Note: you can reference our popular Kenmore vintage sewing machine model list. Which contains model numbers, manufacturer, and period of manufacturing.
How Do I Read My Kenmore Model Number?
You can find the modal number of your Kenmore sewing machine piece on the bottom base behind the bottom base, or side of the unit. So don’t give up if you don’t see it at first glance.
Also, when you locate the model number plate on your Kenmore sewing machine you should see three numbers first. For instance, you should see numbers like 117,158, 385, or 148. These numbers are the manufacturer’s numbers. You can identify the company that fabricated them via these three-digit numbers.
Note: if the number is engraved in front of the bottom base then probably an older model. Also, the four-digit number on the motor is not the same as the unit’s model number.
How To Determine Your Old Kenmore Sewing Machine Value
Most vintage Kenmore Sewing Machine units were mass-produced to meet the demands of probably entire rural America during Kenmore’s golden years. So rarity in terms of numbers may not be a good way to determine its value. The value of your Kenmore sewing machine is truly derived from the owner’s sense of value and the customer’s.
For instance, the owner of the Kenmore Sewing machine in question would want to get a good price out of it; he or she will hold the unit’s value high. The customer on the other hand would try to devalue pieces so he or she can sell them at a higher price.
The only exception is if the owner still makes use of it and is willing to let go for a price. Or if the buyer/owner holds very sentimental value for the Kenmore Sewing machine unit.
These variables are not that easy to measure from one antique Kenmore Sewing machine owner or customer to another. The best approach is to consider the general way to get a sense of its value. And that is the time it was made, its model, and if it’s in a good condition or not.
Condition
No vintage or antique piece will sell for its actual price if it’s in a bad condition. Although, some perishable parts of the sewing machine such as the bobbin case, Spools, presser bar, belt, and so on could be overlooked. But if the damage is so bad that it can’t return to normal working conditions then its value is bound to be very low or non-existent.
Model
The model of the Kenmore Sewing machine in question is also a good way to determine its price. As there’s a model for every Era. But the value of the model depends on the Collector’s demands. Because for his/her reason he or she could prefer an antique and more manual model. Some collectors could even value vintage Kenmore Sewing machines which also have many features in place that are absent in antique models. Or modern computerized models that are made of plastic.
Age
Another way to determine the value of your Kenmore sewing machine is from its age. As the older units are generally supposed to cost more than new ones.
For instance, some of the first models of the Kenmore Sewing machine were the handle-powered and treadle-powered vibrating shuttle hook system. Both of which are manual masterpieces made in the 1900s that possess the strongest Kenmore motors ever and are built to last another 100 years. Such Kenmore units are bound to hold more value than later ones like the electrical units (made in 1930) that possess more features than the previous models.
Note: the older Kenmore units are said to be more sturdy and effective than the later models.
Top 9 Antique Kenmore Sewing Machines To Buy This 2022
Here are several popular Kenmore sewing machine models during each of their eras. Each with its price range in the antique market:
9. Vintage Sears Kenmore Sewing Machine Model 158-12310
Kenmore’s model 158-12310 Sewing Machine was made during the late 70s. Its overall design makes it easier to use with all the hooks, spindles and bobbins placed in great positions. Which makes threading them far easier and faster. Although, this sewing machine system can only offer the zigzag and the straight stitch. But it’s functions also allow you to determine the length as well as the width (knitting capabilities) of those stitches.
Price range $(150 – 250)
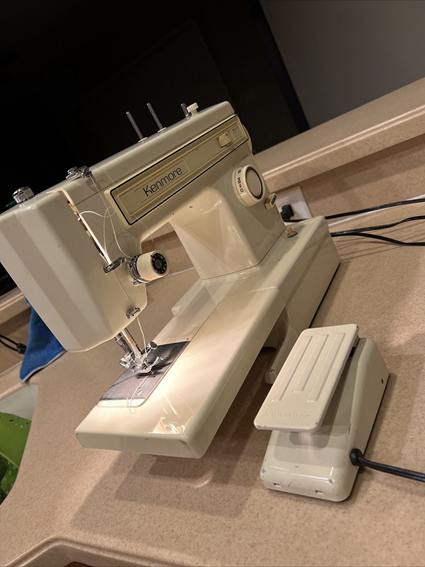
8. Kenmore 30
This is a pre-computer age model that offers up to 30 types of stitching patterns. It was produced and sold from the late 70s to 80s. As a Japanese company, Janome was the manufacturer in charge of producing such units. Users of this Kenmore model express extreme satisfaction with its highly intuitive design that newbies would find easy to use. Also, the machine is completely ergonomy with its light plastic build, comfortable top handle, and light bulb for complete concentration on workpieces.
7. Kenmore Model 158.1941
Kenmore Model 158.1941 is a free arm Kenmore sewing machine that was made during the 70s by Janome as well. It was arguably the most powerful motor during the 70s. It shares a similar design that provides about the same simple user experience as the Kenmore 30. Except that it’s louder than the 30. It also provides multiple stitching patterns.
6. Kenmore 117. 959
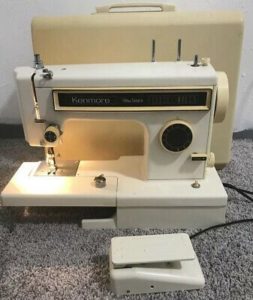
This is an earlier model that was first manufactured under the Kenmore name in the 1940s by White. It offers a simple all-metal design built on a sturdy wooden cabinet that’s bound to last hundreds if maintained properly. Although it doesn’t have many stitching patterns to choose from. As it is one of the first Kenmore Sewing machines to run on electricity.
5. Kenmore Model 54 (158.542)
Here’s one of the best white-made Kenmore models which were manufactured during the 50s. It consists of a well-designed sewing machine fixed on a sturdy and large cabinet that runs on electricity via a foot pedal.
Also, it’s one of the earliest models that ventures into providing multiple stitching patterns. Which were not built-in as you had to make use of cam discs. These cam discs are like insertables that enable the machine to perform certain stitching styles.
However, threading this model can be a chore.
Range $(50 – 100)
4. Kenmore model 148-12181
It’s an electric powered heavy duty piece that operates on with respect to an automatic foot pedal. The general build is all steel which makes it all the more sturdy, durable, and stylish. It also possesses a light bulb to improve work space visibility.
The only problem users have with this model is the motor. Which may be a little bit sluggish and would require constant oiling.
3. Vintage Antique Kenmore Sewing Machine E-6354
This is an electric powered rotary sewing machine. It’s one of the few Kenmore sewing machines made in 1942 (by White) during world War two. Overall, the design is actually straightforward with the external bobbin and it comes with functions that improve detailing. Such as the ability to slow your needle down and determine the thickness of your stitch.
2. Kenmore 158.1340
Here’s an 80s Kenmore piece that offers various stitches at the turn of a dial and pulls or pushes of a lever. Its overall design is sturdy and strong enough to handle heavy-duty work. Also, the model comes with a bulb that illuminates the workspace. However, the downside of working with this machine is that you’ll have to extract it from the cabinet before replacing the front load bobbin.
1. Kenmore 385
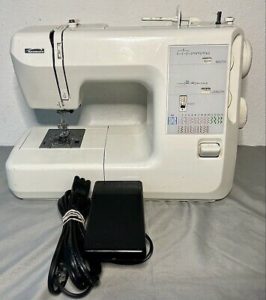
This is also a Janome manufactured model but it was made during the 2000s. It is a completely computerized unit that’s integrated with loads of functions. But they aren’t as aesthetic as the older vintage models. Due to its bulky plastic design.
Popular Kenmore Sewing Machine Models List
Kenmore Machine Model Name (Model Number) |
Production Year |
Kenmore Standard Rotary |
1934 |
Kenmore Long Shuttle (117.26) |
1938 |
Kenmore Model 83 (117.83) |
1938 |
Kenmore Model 117.959 |
1940 |
Kenmore (Model 54) |
1950 |
Kenmore Zigzag Automatic (117. 740) |
1956 |
Lady Kenmore (Model 89) |
1958 |
Kenmore 148.11010 |
1960s |
Free Arm Kenmore (158.1941) |
1970 – 1980 |
Kenmore 158.1340 |
1980s (late) |
Kenmore (158.1069) |
1979 |
Kenmore (158.1211) |
1985 |
Kenmore 385 |
2000s |
How To Troubleshoot An Old Kenmore Sewing Machine
Kenmore vintage sewing machines have a lot of do-it-yourself troubleshooting fixes that you can practice at home. To keep your classic devices up and running as though it’s a new piece. These fixes total up to ten which should suffice for a vintage sewing machine with no electrical wirings or complicated components like the Janome models from 1970 to 2013.
Here are 10 fixes or troubleshooting methods to keep your Kenmore sewing machine up and running:
10. Oil Problems
This is the least and the most common issue with vintage sewing machines like the Kenmore. Due to their all-metal structure, they are bound to rust up at some point. So oiling from time to time is necessary for reviving them.
How do you oil your vintage Kenmore Sewing Machine? You pour a few drops of oil into any moving metal part on your sewing machine. Be it the tension disc or moving gears. But not just any lubricant or grade of oil. It has to be the oil recommended for your Kenmore sewing model on the manual or the one that comes with it.
Note: do not oil just any part of the machine. It’s ideal to reference the manual on which parts are to be oiled before you shoot oil through holes that don’t need them. As you might need to open up a compartment via a hinge.
9. Loose Stitches
This issue would cause your workpieces to fall apart, even immediately after a work session. And it’s all because your thread path isn’t tight enough. So the best fix for loose sticking is to adjust the threading for your sewing machine:
- Monitor the bobbin thread. As the bundle of thread laying on your drop-in or front-loading bobbin may be sitting loosely in the bobbin cage. Thus causing issues with your workpiece stitching in the long run.
- You could also re-thread your sewing machine. Because there could be an unhooked thread along your thread path. This issue could prevent your machine from attaining the right amount of tension to ensure more precise and tighter stitching.
- Another way to get tight stitching is to make sure the weight of the thread matches the weight of the workpiece material. For instance, your silk workpiece can’t be tightly stitched with a cotton thread.
- Adjust upper tension.
8. Reverse Problems
There are two ways through which this issue can occur.
- The reverse lever gets stuck
- Or the machines happen to only sew backward
In the case of the reverse lever or button getting stuck, you should remove the lever or the button itself. Once removed, locate a spring. If the coils appear to contract then you should try to move the spring about until it loosens up.
If the machine is sewing backward, then the problem may be a bit technical. As it could get to the stage of needing a professional that fixes vintage sewing machines. But before you resort to that, you should clean the gears behind the reverse lever. As it could be riddled with old grease and gunk that solidify over time.
7. Zigzag Trouble
The issue could stem from poor maintenance. For instance, the hooks lifting the thread or the teeth within the gears may be worn down from overuse. You should oil the hooks and replace the worn-out gear to ensure the zigzag stitching pattern is functioning.
If the problem seems to persist then you should reference the machine’s manual. That way you get to determine which settings or devices you may require for the zig-zag stitching pattern to function properly.
Your zigzag pattern stitching can also stem from the machine’s timing problems. At this point, it would be beneficial to seek a professional.
6. Tension Repair
Sometimes you may notice the lack of uniformity in your stitching, as there could be skipped and skewed stitches. This is the result of applying the wrong upper thread tension to the wrong workpiece. For instance, you may have applied a higher upper thread tension to a workpiece that requires a slightly lower thread tension. Or vice versa.
- The best way to handle such an issue is by testing the various sewing machine tension settings via trial and error method. Here’s a set of instructions to follow:
- Test out the upper thread tension of the machine. Get a test piece of your workpiece and sew a straight stitch.
- If you notice skipped and skewed stitches on the top part of the fabric, then you will need to loosen the upper thread tension a bit. But if you notice any disuniformity under the test fabric then you should tighten up the upper thread tension.
- Rinse and repeat the process for all thread tension settings. Until both parts of the test fabric are uniform and free of any skipped stitch or skewed ones.
5. Feed Dog Troubleshooting
The feed dogs are metal teeth that hold and move the workpiece as you stitch. Sometimes they do end up freezing, have poor gripping, or their timing doesn’t match with the needle.
Here are ways to tackle each cause:
- If teeth end up freezing, then it’s due to a lack of proper maintenance. As the solution is to clean and oil the movable parts around the feed dogs.
- And if Timing could be the issue. Then the problem can be very technical, so it’s best to hand over your sewing machine to a professional.
- But if it’s just the material being too slippery or hard to grip down. Like silk, you might just need to make use of your hands to shift the cloth a bit as you stitch.
4. Broken Thread
One of the very possible scenarios for why your thread keeps breaking is because it’s a faulty one. Such a piece of thread would break no matter how many times you use it to rethread your machine. So getting a good replacement is the ideal solution.
Sometimes it could be the excessively tight tension on the upper thread. This can cause your thread to easily snap upon sewing. You can prevent this by adjusting your sewing machine’s upper thread tension.
Another possible cause could be incorrect threading. Such can cause the machine to jam. You Should fix the problem by rethreading the machine effectively.
The needle plate or bobbin case may have dents or scratches which can cut up the thread as your sole. Try as much as possible to locate this problem and file them smoothly or replace such parts if needed.
Also, there are cases where the bobbin thread would break up repeatedly. This is a result of the tension on the bobbin case being too high. It’s best to loosen up the screw that holds this case’s tension.
3. Tangle thread
Bird’s nesting, jamming, or tangled stitch beneath your fabric is commonly a result of bad threading. And it can be solved by following these steps:
- The first step to take is to cut the thread from its source which is the spool. And then cut the thread connected to the endpoint which is above the needle. This should allow you to easily pull without any struggle.
- Gently extract any lint stored in the upper thread or bobbin area with a small brush.
- Now that your machine is free of the old thread, you can then proceed to rethread. But do so with the presser foot up. As it allows the tension disc to be easily accessible.
- Then thread the needle.
2. Troubleshooting Bobbin Thread
It’s easy for the bobbin thread to get tangled up. Especially if you don’t keep your bobbin area clean and free of lint. Because this area is known to gather more dirt and remains than any other part of a vintage sewing machine. You can solve this problem by unscrewing the needle plate from the machine and then extracting dirt from the bobbin area.
Sometimes the issue might be the machine’s setup before you begin working with it. For instance, if you proceed to sew with the presser foot up, the bobbin thread will get tangled. When this happens, extract the bobbin thread, get rid of the tangle, put in the bobbin thread, and then lower the presser foot down. All before sewing.
The issue might even be due to an accessory that doesn’t fit into the machine’s system. Such as a bobbin with an incorrect shape or size. The ideal way to deal with this issue is to reference your sewing machine’s manual to identify the right bobbin.
1. The Machine Has Ceased Sewing
The most common reason why your vintage sewing machine fails to sew is probably that it has lost its power source. As the power chord or foot pedal cord could be detracted accidentally. So try reattaching it and securing it from detaching once again.
Another possible reason could be issued with the needle or your sewing machine might be experiencing thread jam. The best way to solve these problems is by rethreading the machine and replacing the damaged needle.
Also, your Kenmore sewing machine might have a damaged motor or some wiring issues. Such problems would require the expertise of a professional vintage sewing machine repairer.
Note: ensure that you fix your Kenmore sewing machine according to the unit’s manual model.
How to Find Kenmore Sewing Machine Manual
There isn’t a website that has all the manuals available. However, there are various websites with a handful of Kenmore sewing machine model manuals. For instance, you can get manuals for models starting with 385 and 195 from m.Sears.com. You can find the manuals by navigating to the home manager column, from which you’ll find the owner’s manual in the next window or drop menu. This website happens to be sponsored by Sears and it doesn’t require any form of payment to be a member.
You can also find fragments of Kenmore sewing machine model manuals on homeappliancesmanualsonline.com. It contains more new models made in the 70s, 80s, and 2000s. However, these manuals are available at a price (usually between $10 to $200) on this website.
Kenmore Sewing Machine Manuals are also available on managemylife.com. And you can get them for free. To access the manuals in question, follow these steps:
- Visit comand register (it’s free)
- Click on manuals on top of the dashboard
- You should see a search box
- Input the whole model number in the box. (e.g. For module 1751 input the whole code/number like 158.17511)
Note: you can decide to omit the last model digit to get better results.
Where to Buy an Antique Kenmore Sewing Machine
Your best chance of getting antique Kenmore Sewing machines is by visiting your local store. Preferably an antique store where you’re bound to find units in great condition. However, the prices may be steep because of this fact. You can find the cheaper Kenmore Sewing machine at thrift stores.
If you don’t have local stores available. .. in your area and you’re not willing to travel then you can resort to online retailers like eBay, Etsy, and Craigslist. However, these units may not be in the best of conditions.
Additional Online Resources
This post can only offer you a general approach to evaluating and identifying your antique Kenmore sewing machine piece. However, it may not be able to cover exactly everything. This is why we recommend some high-quality sources that should get you in the ballpark.
You can start by researching any additional comprehensive guide on Kenmore sewing machines. It should contain timelines of various sewing machines styles from which you can depict their value and identity.
Also, you can visit “Kenmore sewing machine help” which is a forum where you can reach other Kenmore sewing machine collectors.
Final Words
By now you should be more of an expert when it comes to buying, identifying, and valuing an Antique Kenmore Sewing Machine unit. As we’ve provided in this post the history of the product in terms of the style and working principle (from mechanical treadle power to electricity and advanced technology). Along with instructions on how to identify your Kenmore sewing machine unit.
We’ve also provided you with useful tips on how to troubleshoot your vintage Kenmore Sewing Machine for common issues. However, if the problem seems to be beyond your expertise or the coverage of this post then the best action is to contact a professional.
![Vintage Schwinn Bikes: [Types, Identification, and Values]](https://www.txantiquemall.com/wp-content/uploads/2022/05/5.-Schwinn-1967-Ramshorn-Fastback-Stingray-Sky-Blue-vtg-600x450.jpg)